Blog 2.0

All Natural Dog Treats Homemade: A Healthy and Delicious Recipe for Your Pup

As a dog owner, you want to give your furry friend the best, and that includes healthy treats made from wholesome ingredients. Store-bought treats often contain preservatives, artificial flavors, and fillers that may not be the best for your pup’s health. That’s why making all natural dog treats homemade is the perfect solution!

Benefits of Homemade Dog Treats

  • No harmful additives – You control the ingredients, ensuring they are fresh and natural.
  • Better digestion – Natural treats are gentler on your pup’s stomach.
  • Cost-effective – Making treats at home is often cheaper than buying high-quality store-bought options.
  • Tailored to dietary needs – You can customize treats based on your dog’s allergies or preferences.

Easy Peanut Butter & Pumpkin Dog Treat Recipe

This all natural homemade dog treat recipe is not only easy to make but also packed with nutrients. Pumpkin is great for digestion, while peanut butter adds a delicious taste that dogs love!

Ingredients:

  • 1 cup pumpkin purée (not pumpkin pie filling)
  • ½ cup natural peanut butter (no xylitol, which is toxic to dogs)
  • 2 cups whole wheat flour (or oat flour for gluten-sensitive pups)
  • 1 egg
  • ½ teaspoon cinnamon (optional)

Instructions:

  1. Preheat oven to 350°F (175°C) and line a baking sheet with parchment paper.
  2. In a mixing bowl, combine pumpkin purée, peanut butter, egg, and cinnamon. Stir until well blended.
  3. Gradually add the flour and mix until a dough forms.
  4. Roll out the dough on a floured surface to about ¼-inch thick and use a cookie cutter to cut out shapes.
  5. Place treats on the prepared baking sheet and bake for 20-25 minutes, or until golden brown and firm.
  6. Let cool completely before serving to your pup.

Storage Tips

  • Store in an airtight container for up to one week at room temperature.
  • Keep in the refrigerator for up to two weeks for longer freshness.
  • Freeze for up to three months and thaw as needed.

Final Thoughts

Making all natural dog treats homemade is a rewarding way to show love to your furry friend. With just a few simple ingredients, you can provide a healthy, delicious, and safe snack that will keep tails wagging!

Give this recipe a try and let us know how your pup likes it in the comments below! 🐾💕

🍀 Shamrock Dog Treats: A Healthy & Festive Recipe for Your Pup! 🍀

Introduction: Why Homemade Dog Treats?

As dog lovers, we want to give our furry friends the best—healthy, tasty, and nutritious treats that are free of artificial additives. Store-bought treats can often be filled with preservatives and questionable ingredients, which is why making your own at home is a great alternative.

With St. Patrick’s Day around the corner, why not celebrate with homemade shamrock-shaped dog treats? These festive, all-natural snacks are packed with dog-friendly ingredients and are super easy to make. Whether you’re Irish or just love a good holiday theme, these treats will have your pup feeling lucky! 🍀🐶

The Benefits of Homemade Dog Treats

Before we jump into the recipe, let’s talk about why homemade dog treats are a great choice for your pup:

Wholesome Ingredients – You control what goes in, ensuring high-quality, nutritious food.
Allergen-Friendly – Many dogs have food sensitivities, and making treats at home lets you avoid allergens.
Cost-Effective – Buying specialty dog treats can be expensive, but homemade versions are budget-friendly.
Customizable – Adjust flavors and ingredients based on your dog’s taste and dietary needs.

Now, let’s get to baking! 🦴✨

🍀 Shamrock-Shaped Dog Treat Recipe 🍀

Ingredients:

To make these festive and healthy shamrock-shaped treats, you’ll need:

  • 2 cups whole wheat flour (or oat flour for a gluten-free option)
  • ½ cup pumpkin puree (great for digestion!)
  • ¼ cup unsweetened applesauce (adds natural sweetness)
  • 1 egg (for binding)
  • ¼ cup parsley, finely chopped (helps freshen breath!)
  • 1 tablespoon coconut oil (good for skin & coat)
  • ¼ cup low-sodium chicken broth or water (as needed for consistency)

Instructions: Step-by-Step

Step 1: Preheat & Prepare

Preheat your oven to 325°F (163°C). Line a baking sheet with parchment paper or a silicone baking mat to prevent sticking.

Step 2: Mix the Dough

In a large mixing bowl, combine the flour, pumpkin puree, applesauce, egg, parsley, and coconut oil. Stir well until the mixture begins to form a dough. If it feels too dry, slowly add the chicken broth or water, one tablespoon at a time, until the dough is firm but not sticky.

Step 3: Roll & Cut Out Shamrocks

Lightly flour a clean surface and roll out the dough to about ¼ inch thickness. Use a shamrock-shaped cookie cutter to cut out your festive dog treats. If you don’t have a shamrock cutter, you can use a knife to shape them or go with simple circles.

Step 4: Bake the Treats

Place the cut-out shamrocks on your prepared baking sheet. Bake for 25–30 minutes, or until the treats are golden brown and firm to the touch.

Step 5: Cool & Serve

Once baked, let the treats cool completely before serving. Store them in an airtight container at room temperature for up to one week, or freeze them for longer shelf life.

Why These Ingredients Are Great for Dogs

Each ingredient in these treats was chosen to benefit your pup’s health:

✔️ Pumpkin Puree – A great source of fiber and vitamins, pumpkin helps with digestion.
✔️ Parsley – Known for freshening doggy breath, parsley also has anti-inflammatory properties.
✔️ Coconut Oil – Supports healthy skin, coat, and digestion.
✔️ Applesauce – Adds a touch of natural sweetness without any added sugars or artificial flavors.

Fun Ways to Customize Your Shamrock Dog Treats

If you want to get creative, here are some fun ways to customize the recipe:

🍏 Green Color Boost – Add a pinch of spirulina powder or wheatgrass powder to make them extra green and even more nutrient-packed.
🦴 Crunchier or Softer – If your pup prefers a crunchier treat, bake them an extra 5 minutes. For softer treats, reduce baking time by a few minutes and store in the fridge.
🥜 Flavor Twists – Swap out the pumpkin for mashed banana or peanut butter (make sure it’s xylitol-free!).

Serving & Storing Tips

  • Portion size: These treats are best for medium to large dogs, but if you have a small pup, simply break them into smaller pieces.
  • Storage: Keep them in an airtight container for up to a week at room temperature, or refrigerate for up to two weeks. You can also freeze them for up to 3 months—just thaw before serving.

Why Your Dog Will Love These Shamrock Treats Dogs love treats, and when you make them from scratch, you know you’re giving them the best. The mix of pumpkin, parsley, and coconut oil makes these not only delicious but also nutritious. Plus, the fun shamrock shape makes them perfect for celebrating St. Patrick’s Day!

Whether you’re hosting a dog-friendly holiday party or just want to treat your furry friend, these homemade shamrock dog treats are a lucky charm your pup will love. 🍀🐕

Celebrate with Homemade Dog Treats!

Making your own homemade dog treats is a simple and rewarding way to show your dog how much you care. These shamrock-shaped goodies are festive, healthy, and easy to bake. Plus, they make a thoughtful gift for other dog parents in your life!

Are you planning to bake these for your pup? Share a photo and tag us on social media! 📸🐾

🐶🍀 Happy Baking & Happy St. Patrick’s Day! 🍀🐶

Whip Up These Easy Peanut Butter Dog Treats in No Time

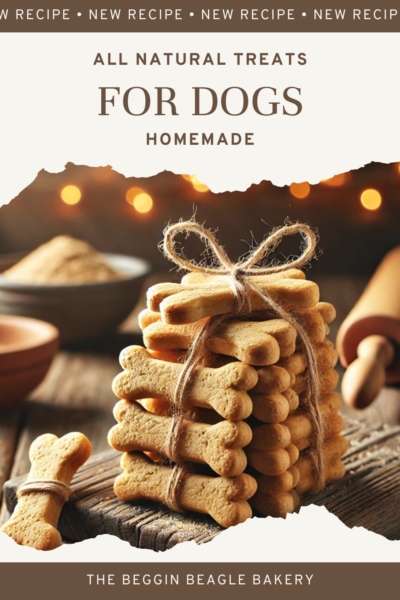
If you’re a dog parent like me, you know that our furry friends deserve nothing but the best. And what better way to show some love than by whipping up a batch of homemade treats? Today, I’m excited to share my no-nonsense recipe for easy peanut butter dog treats—a recipe that’s as straightforward as it is delicious. Whether you’re a seasoned cook or someone who’s just learning to make something other than toast, this recipe is for you. Plus, it’s packed with wholesome ingredients that your pup will adore.

Why Homemade Treats?

Let’s be real: store-bought dog treats often come loaded with preservatives, artificial flavors, and ingredients that leave you scratching your head. Making your own treats gives you full control over what goes into them, ensuring that your best friend is snacking on something nutritious. Not to mention, there’s a special satisfaction in knowing you made these treats with love, and your dog’s tail-wagging approval is all the reward you need.

A Quick Note on Peanut Butter

Peanut butter is a favorite flavor for both humans and dogs, but not all peanut butters are created equal. When picking your peanut butter, make sure it’s free of xylitol—a sugar substitute that’s toxic to dogs. The best bet is to go for a natural, unsweetened variety. Trust me, your pup will taste the difference, and you’ll feel better knowing you’re not risking their health.

Let’s Get Started: The Recipe

This recipe is super simple, requiring just a handful of ingredients that you probably already have in your kitchen. Here’s what you’ll need:

Ingredients

  • 1 cup whole wheat flour (if your dog has a wheat allergy, you can substitute with oat flour or rice flour)
  • 1/2 cup rolled oats
  • 1/4 cup natural, unsweetened peanut butter
  • 1/4 cup water (more if needed)
  • 1 egg
  • Optional: A drizzle of honey for a touch of natural sweetness (great for those dogs with a sweet tooth, but skip if you’re watching calorie intake)

Equipment

  • A mixing bowl
  • A rolling pin (or a clean bottle will do in a pinch)
  • Cookie cutters (bonus points if you have fun shapes like bones or paws)
  • A baking sheet lined with parchment paper

Step-by-Step Instructions

1. Preheat and Prepare

First things first, preheat your oven to 350°F (175°C). While you’re waiting for the oven to warm up, line your baking sheet with parchment paper. This ensures that your treats don’t stick and makes cleanup a breeze.

2. Mix the Dry Ingredients

In your mixing bowl, combine the whole wheat flour and rolled oats. Stir them together so they’re evenly distributed. This is the foundation of your treat dough, so take your time and make sure it’s well mixed.

3. Add the Wet Ingredients

Now, add in the natural peanut butter and the egg. Start stirring these into the dry ingredients slowly. As the mixture begins to come together, gradually add water. The goal here is to achieve a dough-like consistency that isn’t too sticky or too dry. If it feels too dry, add a splash more water; if it’s too sticky, sprinkle in a little extra flour.

4. Roll Out the Dough

Lightly dust your work surface with flour and transfer the dough onto it. Use your rolling pin to flatten the dough to about 1/4 inch thickness. Rolling it out evenly ensures that all your treats will bake at the same rate.

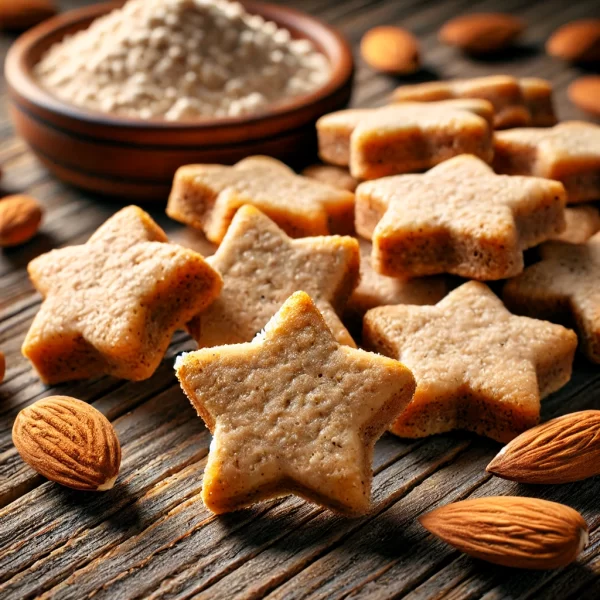
5. Cut Out the Treats

Here’s where the fun part comes in: using your favorite cookie cutters, cut the dough into shapes. I like to use a bone-shaped cutter for that extra touch of doggy delight, but any shape will do. If you don’t have cookie cutters, simply cut the dough into small squares or strips with a knife.

6. Bake to Perfection

Place your cut-out treats on the prepared baking sheet. Slide them into your preheated oven and bake for about 15-20 minutes. Keep an eye on them—the edges should be lightly browned when they’re done. Every oven is different, so if you’re making them for the first time, it might be a good idea to check at the 15-minute mark.

7. Cool and Enjoy

Once baked, remove the treats from the oven and let them cool completely on a rack. This cooling step is crucial—it helps the treats firm up and makes them easier for your dog to handle. Plus, it gives you a chance to do a little victory dance knowing you just made something awesome for your pup.

Tips for Treat-Making Success

  • Experiment with Flavors: Once you’ve mastered the basic recipe, feel free to experiment. Add a little pumpkin puree for extra moisture and flavor, or toss in some finely chopped carrots for added crunch.
  • Storage: Store your homemade treats in an airtight container. They’ll keep fresh for about a week at room temperature. If you’re planning to make a big batch, consider freezing them in small portions for longer-term storage.
  • Portion Control: Remember, these treats are a supplement to your dog’s regular diet. Too many treats, even healthy ones, can upset your dog’s stomach or lead to unwanted weight gain.
  • Monitor for Allergies: Introduce new treats slowly, especially if your dog has a history of food sensitivities. Always keep an eye out for any adverse reactions.

The Benefits of Homemade Dog Treats

Making your own dog treats isn’t just a fun activity—it’s also a fantastic way to ensure your pet is getting the best possible ingredients. Here’s why I think homemade is the way to go:

Freshness and Quality

Commercial dog treats can be hit or miss in terms of quality. With homemade treats, you know exactly what’s going into them. Every ingredient is fresh, natural, and chosen with your dog’s health in mind. No hidden chemicals, no mystery additives—just good, honest food.

Cost-Effective and Customizable

Believe it or not, making treats at home can actually be more budget-friendly. When you break down the cost of ingredients, you’ll often find that homemade treats are cheaper per treat than buying premium brands off the shelf. Plus, you can adjust the recipe to suit your dog’s preferences and dietary needs.

A Bonding Experience

There’s something incredibly rewarding about preparing something by hand for your pet. It’s a simple act of love that strengthens the bond between you and your dog. And hey, it might even become your new favorite weekend project!

A Few Gen X-Style Reflections

Back in the day, we didn’t have all these fancy dog treat brands promising the moon. We made do with what we had, and we did it right. There’s a sense of pride that comes with knowing you put in the effort to create something truly beneficial for your pet. Today’s fast-paced world might tempt you to just grab a bag from the store, but taking the time to make these treats can be a refreshing break from the usual hustle.

I like to think of it as a little rebellion against the overly processed, convenience-everything culture. We know the value of quality and craftsmanship. Whether it’s a home-cooked meal or a well-made treat, nothing beats the satisfaction of knowing it was made with care. And let’s face it, our dogs deserve that same level of attention and quality.

Final Thoughts

Homemade peanut butter dog treats are more than just a snack—they’re a statement. They say, “I care about you, and I’m willing to put in the time and effort to make something special for you.” This recipe is perfect for busy folks who want to do something extra for their four-legged companions without spending hours in the kitchen.

So, dust off that rolling pin, grab your natural peanut butter, and get baking. Your dog will thank you with every wag and every lick. And who knows? This might just be the start of a whole new hobby that’s as rewarding as it is tasty.

Remember, every batch is a little experiment in love and creativity. Feel free to tweak the recipe, add your own flair, and share your successes (or funny mishaps) with fellow dog lovers. After all, the best recipes are the ones that bring us together—both human and canine alike.

Happy baking, and here’s to many happy, healthy, and tail-wagging moments ahead!

The Ultimate Dog Birthday Pupcake Recipe: A Tail-Wagging Treat for Your Pup’s Special Day!

Introduction

Every dog deserves a special treat on their birthday! Whether you’re throwing a full-blown birthday bash or simply want to spoil your furry friend, a homemade dog-friendly cupcake (pupcake) is the perfect way to celebrate. Unlike store-bought treats, this homemade dog birthday treat is made with wholesome, pup-safe ingredients that will have your dog’s tail wagging with joy! In this post, we’ll walk you through how to make healthy, delicious, and easy dog birthday pupcakes that are safe and nutritious.

Let’s get baking and make your pup’s birthday extra special!

Why Make Homemade Dog Treats?

With so many commercial dog treats available, you might wonder why you should go the homemade route. Here are a few reasons why baking your own dog birthday treats is the best option:

  1. Control Over Ingredients – Store-bought treats can contain artificial additives, preservatives, and unhealthy fillers. When you bake at home, you choose fresh and natural ingredients.
  2. Healthier Alternative – Many commercial treats are loaded with sugar and unhealthy fats. With a homemade pupcake, you can use nutritious ingredients that benefit your dog’s health.
  3. Allergy-Friendly – Some dogs have food sensitivities, and making homemade treats allows you to avoid allergens and customize ingredients.
  4. It’s Fun! – Baking for your pup is a fun and rewarding experience, and your dog will appreciate the love and effort you put into their birthday treat!

Dog Birthday Pupcake Recipe

Ingredients:

To make these delicious dog birthday pupcakes, you’ll need the following ingredients:

For the pupcakes:

  • 1 cup whole wheat flour (or oat flour for gluten-free option)
  • 1 teaspoon baking powder
  • ¼ cup unsweetened applesauce
  • ¼ cup peanut butter (xylitol-free)
  • 1 ripe banana, mashed
  • 1 egg
  • ¼ cup water or low-sodium chicken broth

For the frosting:

  • ½ cup plain Greek yogurt
  • 1 tablespoon peanut butter (xylitol-free)

Instructions:

Step 1: Preheat & Prep

Preheat your oven to 350°F (175°C). Line a muffin tin with cupcake liners or lightly grease them to prevent sticking.

Step 2: Mix the Dry Ingredients

In a medium-sized bowl, whisk together the whole wheat flour and baking powder until well combined. This ensures even distribution and fluffier pupcakes.

Step 3: Mix the Wet Ingredients

In a separate large mixing bowl, mash the ripe banana with a fork until smooth. Add the applesauce, peanut butter, egg, and water (or chicken broth). Stir well until everything is fully incorporated.

Step 4: Combine Wet & Dry Ingredients

Gradually add the dry ingredients to the wet mixture, stirring gently until a thick batter forms. Be careful not to overmix, as this can make the pupcakes dense.

Step 5: Bake the Pupcakes

Scoop the batter into the prepared muffin tin, filling each cup about ¾ full. Bake in the preheated oven for 15-20 minutes, or until a toothpick inserted into the center comes out clean.

Step 6: Cool Completely

Allow the pupcakes to cool in the pan for about 5 minutes, then transfer them to a wire rack to cool completely before frosting.

Step 7: Make the Frosting

While the pupcakes are cooling, mix Greek yogurt and peanut butter in a small bowl until smooth. This makes a creamy and healthy frosting that’s safe for dogs.

Step 8: Frost & Decorate

Once the pupcakes are completely cool, spread the frosting on top using a spoon or piping bag. Add a dog-friendly treat, banana slices, or crushed dog biscuits as a fun topping!

How to Serve Dog Pupcakes

  • Serve as a special birthday treat or reward.
  • Cut into smaller pieces for small dogs.
  • Store leftovers in an airtight container in the fridge for up to 5 days.
  • Freeze extra pupcakes for later – they’ll last up to 3 months in the freezer!

Are These Pupcakes Safe for All Dogs?

Yes! These pupcakes are made with dog-friendly ingredients, but it’s always good to double-check for any food sensitivities your dog may have. Here are a few tips:

Use xylitol-free peanut butter – Xylitol is toxic to dogs, so always read the label. ✅ Choose whole wheat or oat flour – If your dog has wheat allergies, opt for oat flour instead. ✅ Greek yogurt is a great alternative – It’s packed with probiotics and safe for most dogs in small amounts.

Fun Ways to Make Your Dog’s Birthday Special

Want to go the extra mile? Here are some paw-some ways to make your pup’s birthday memorable:

🎉 Throw a Dog Party – Invite your dog’s furry friends over for a puppy playdate with treats and toys. 🎈 Give Your Pup a New Toy – A birthday is the perfect time to surprise your pup with a new chew toy or plushie. 📸 Have a Dog Photoshoot – Dress your pup in a party hat and capture the cutest birthday moments. 🎂 Make a Full Dog-Friendly Cake – Double the recipe and bake in a cake pan for a larger celebration treat.


Final Thoughts: A Special Treat for Your Special Pup!Making homemade dog birthday treats is a great way to show love and appreciation for your four-legged friend. With this easy pupcake recipe, you can create a delicious, healthy, and fun birthday treat that your dog will absolutely adore.

Whether it’s their birthday or just a special occasion, these pupcakes are guaranteed to bring joy and excitement. So grab your mixing bowl, bake up some dog-friendly goodness, and celebrate your pup’s big day in style! 🐾🎂

👉 Download our FREE Dog Treat Recipe Book for more fun and easy dog treat recipes! 🦴🐶🎉

Homemade Dog Treat Recipe: Almond Flour & Cinnamon

A Healthy & Tasty Reward for Your Pup

If you love spoiling your furry friend with delicious and nutritious treats, then this homemade Almond Flour & Cinnamon Star Dog Treat Recipe is perfect for you! Many store-bought treats contain artificial preservatives, fillers, and unhealthy additives that might not be the best for your dog’s health. By making your own treats at home, you control the ingredients and ensure your pup gets the best.

In this post, we’ll dive into the benefits of almond flour and cinnamon for dogs, a step-by-step guide to making these adorable star-shaped treats, and tips for storing them. Let’s get baking!

Why Homemade Dog Treats Are Better

Making dog treats at home allows you to:

✔️ Control the Ingredients – No artificial flavors, preservatives, or fillers.
✔️ Use High-Quality, Nutritious Ingredients – You know exactly what goes into your pup’s snacks.
✔️ Accommodate Dietary Needs – Perfect for dogs with allergies or sensitivities.
✔️ Save Money – Homemade treats are more budget-friendly than premium store-bought options.
✔️ Show Your Love – Nothing says “I love you” more than a freshly baked treat made with care.

Health Benefits of Almond Flour for Dogs

Almond flour is a fantastic alternative to traditional wheat flour, especially for dogs with grain sensitivities. Here’s why:

🐶 Grain-Free & Gluten-Free – Perfect for pups with wheat allergies.
🐶 High in Protein & Healthy Fats – Supports muscle health and a shiny coat.
🐶 Low in Carbs – Helps maintain a healthy weight.
🐶 Rich in Vitamin E – A powerful antioxidant that supports skin and coat health.

⚠️ Note: Almond flour is safe in moderation, but whole almonds should not be given to dogs as they can be difficult to digest.

Is Cinnamon Safe for Dogs?

Yes! Cinnamon is safe for dogs in small amounts and offers some surprising benefits:

✔️ Anti-Inflammatory – Great for older dogs with arthritis.
✔️ Boosts Brain Function – Supports cognitive health.
✔️ Regulates Blood Sugar – Helps with weight management.
✔️ Adds a Delicious Flavor – Dogs love the warm, cozy scent of cinnamon!

⚠️ Warning: Avoid cinnamon essential oil or large amounts of cinnamon, as they can be too strong for dogs. Stick to a pinch for flavor and health benefits.

Almond Flour & Cinnamon Star Dog Treat Recipe

Now, let’s get to the fun part – baking!

Ingredients

🦴 2 cups almond flour
🦴 1/2 teaspoon cinnamon
🦴 1/4 cup unsweetened applesauce or mashed banana
🦴 1 egg
🦴 1 tablespoon honey (optional)
🦴 1/4 cup water (as needed for consistency)

Instructions

Step 1: Preheat the Oven

Preheat your oven to 325°F (163°C) and line a baking sheet with parchment paper.

Step 2: Mix Dry Ingredients

In a large bowl, whisk together the almond flour and cinnamon.

Step 3: Add Wet Ingredients

Add the applesauce (or mashed banana), egg, and honey to the dry ingredients. Stir until combined.

Step 4: Adjust Consistency

Slowly add water (a tablespoon at a time) until the dough holds together but is not too sticky.

Step 5: Roll & Cut Out Shapes

On a floured surface, roll out the dough to about 1/4-inch thickness. Use a star-shaped cookie cutter to cut out adorable treats.

Step 6: Bake

Place the treats on the baking sheet and bake for 20-25 minutes, or until golden brown.

Step 7: Cool & Store

Let the treats cool completely before serving. Store in an airtight container for up to two weeks or freeze for longer freshness.

Customizing Your Dog Treats

Want to switch things up? Here are some fun variations:

🐾 Peanut Butter Twist – Add 1 tablespoon of natural peanut butter (no xylitol).
🐾 Pumpkin Spice – Substitute applesauce with pumpkin puree.
🐾 Crunchier Treats – Bake an extra 5-10 minutes for a crispier texture.

How to Store Homemade Dog Treats

Proper storage keeps treats fresh and safe for your pup:

✔️ Room Temperature: Store in an airtight container for up to two weeks.
✔️ Refrigerator: Keeps treats fresh for up to one month.
✔️ Freezer: Freeze for up to three months and thaw as needed.

How Many Treats Can My Dog Have?

Even though these treats are healthy, they should still be given in moderation. A general guideline:

🐕 Small dogs: 1-2 treats per day
🐕‍🦺 Medium dogs: 2-3 treats per day
🐩 Large dogs: 3-4 treats per day

Remember, treats should not make up more than 10% of your dog’s daily calorie intake.

Fun Ways to Use These Treats

🎾 Training Rewards: Perfect for positive reinforcement.
🐕 Puzzle Toys: Place inside a treat-dispensing toy for mental stimulation.
🎁 Doggie Gifts: Package them in a cute jar for a thoughtful gift.
🎂 Special Occasions: Serve on your pup’s birthday or Gotcha Day!

FAQs About Homemade Dog Treats

Can I use regular flour instead of almond flour?

Yes! If your dog isn’t grain-sensitive, you can substitute whole wheat flour or oat flour.

Is honey safe for dogs?

Yes, in small amounts! Honey is a natural sweetener with antioxidants. However, skip it if your pup is diabetic.

Can I add more cinnamon?

Stick to a small amount (1/2 teaspoon or less) to avoid any digestive issues.

Are these treats good for senior dogs?

Yes! They are soft enough for older dogs, and the cinnamon helps with inflammation.

Making homemade dog treats is a fun, rewarding way to show love for your furry friend. These Almond Flour & Cinnamon Star Treats are healthy, easy to make, and full of flavor! Your pup will adore them, and you’ll have peace of mind knowing they’re enjoying a nutritious snack.

Ready to bake? Try this recipe today and treat your pup to something special! 🐾💖

Share the Love!

📌 Love this recipe? Grab a copy of our famous dog treat recipe book!
📷 Tag us on Instagram with your star-shaped treats!
🐶 Comment below – did your pup love these?

#HomemadeDogTreats #DogMom #HealthyDogSnacks #BakingForDogs #AlmondFlourDogTreats #CinnamonForDogs