Blog

How to Package & Sell Homemade Dog Treats Professionally

The Complete Guide to Turning Your Treats Into a Thriving Business

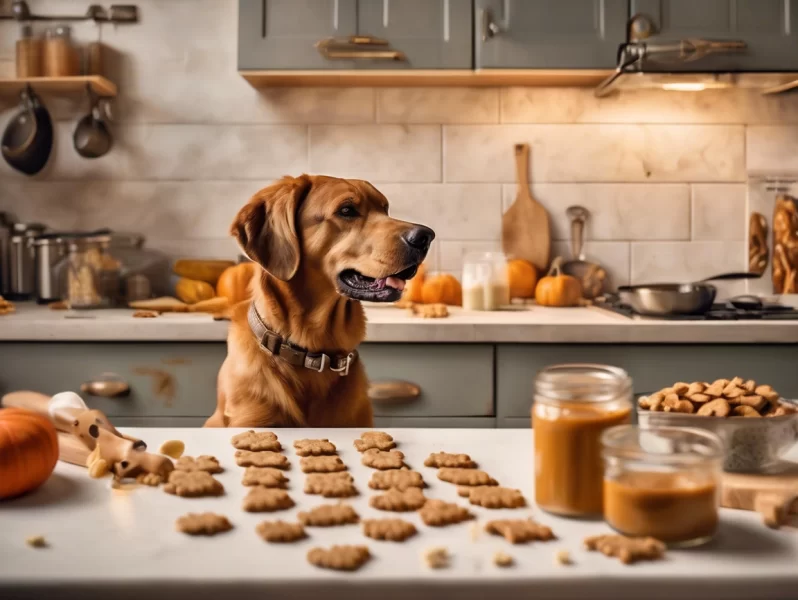
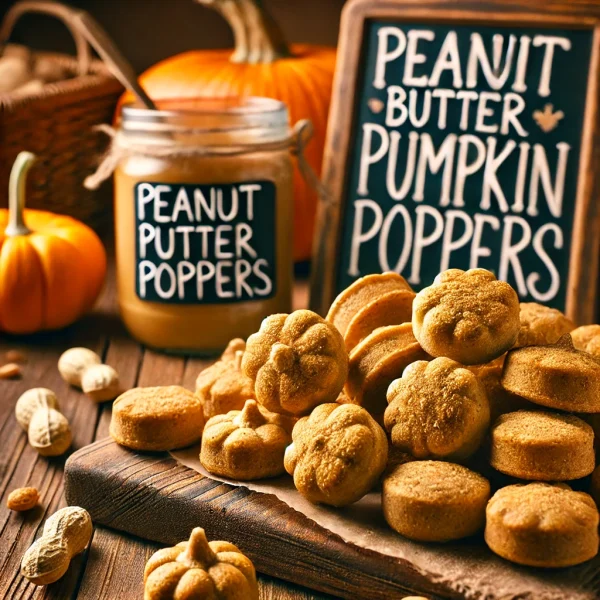
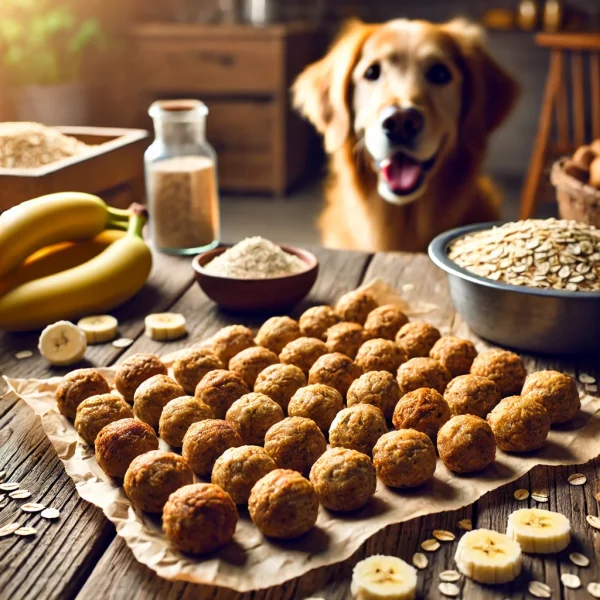
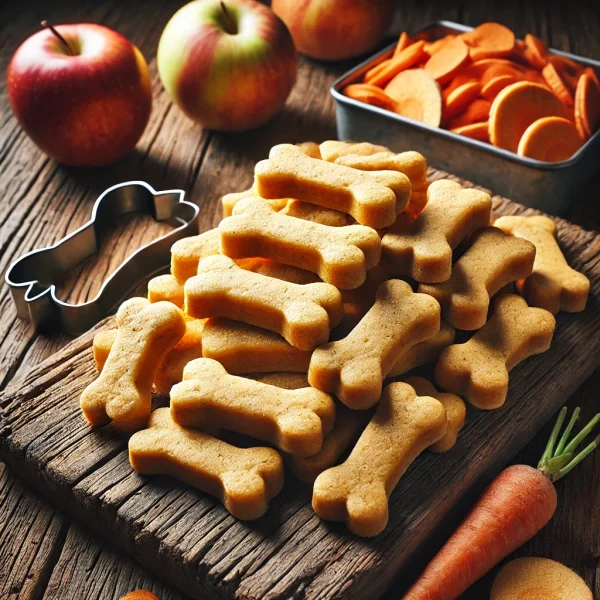
So, you’ve mastered the art of baking delicious homemade dog treats. Maybe your pup can’t stop wagging their tail for your peanut butter pumpkin poppers, or your friends keep asking for more of your apple-carrot crunchies. If you’re ready to turn your passion into profit, it’s time to learn how to package and sell homemade dog treats professionally.

Whether you’re just starting your dog treat business or looking to polish your brand, this post covers everything from dog treat packaging ideas to legal tips and marketing strategies. Plus, stick around to the end for a free printable label pack to dress up your treats with style!

Why Professional Packaging Matters

When selling dog treats, your product has to do two jobs:

  1. Stay safe and fresh.
  2. Stand out on the shelf or online.

That’s where smart packaging comes in. Good packaging not only protects your product but also attracts customers and builds trust.

Here’s why you need to invest in professional packaging if you plan to sell homemade dog treats:

  • Creates a strong first impression
  • Enhances your brand credibility
  • Helps you comply with local food safety laws
  • Boosts customer loyalty and referrals

Legal Basics for Selling Homemade Dog Treats

Before diving into packaging options, let’s quickly cover legal essentials. Depending on your location, you may need:

  • A business license
  • A cottage food license or pet food permit
  • Labeling compliance (ingredients, weight, contact info)
  • Zoning approval if selling from home
  • Insurance and a tax ID

Always check your state or country regulations for pet food. While many allow the sale of homemade treats under cottage food laws, others require inspection or additional labeling.

💡 Dog treat business tip: Keep ingredient lists simple, use dog-safe items, and avoid artificial preservatives that may trigger extra regulatory hurdles.

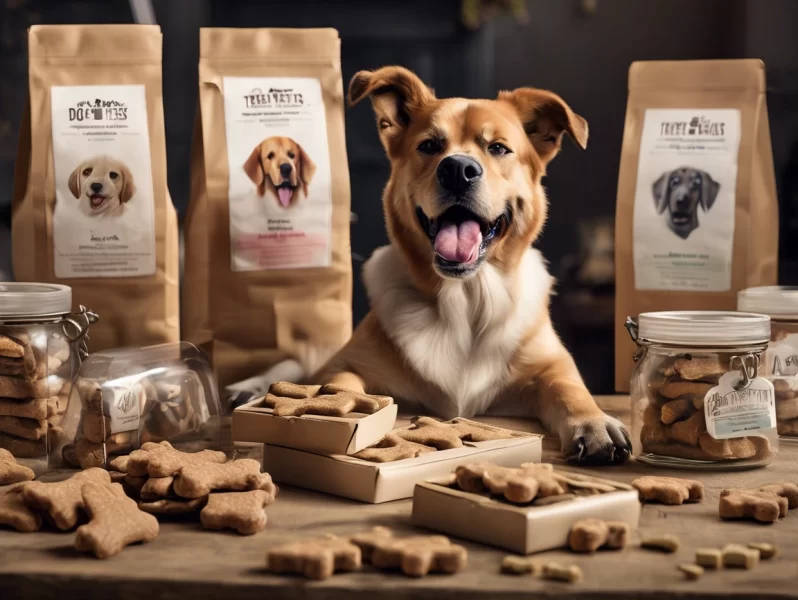
5 Professional Dog Treat Packaging Ideas

Here are the top dog treat packaging ideas that look polished, are cost-effective, and make your product pop:

1. Stand-Up Pouches (Resealable Bags)

These are by far the most popular choice for homemade pet treats. They’re:

  • Airtight and resealable
  • Food-safe with barrier protection
  • Customizable with labels or print
  • Available in kraft paper, clear, or glossy

Pro tip: Use a windowed pouch so customers can see the treats inside—this builds trust and highlights quality.

2. Kraft Paper Boxes or Treat Boxes

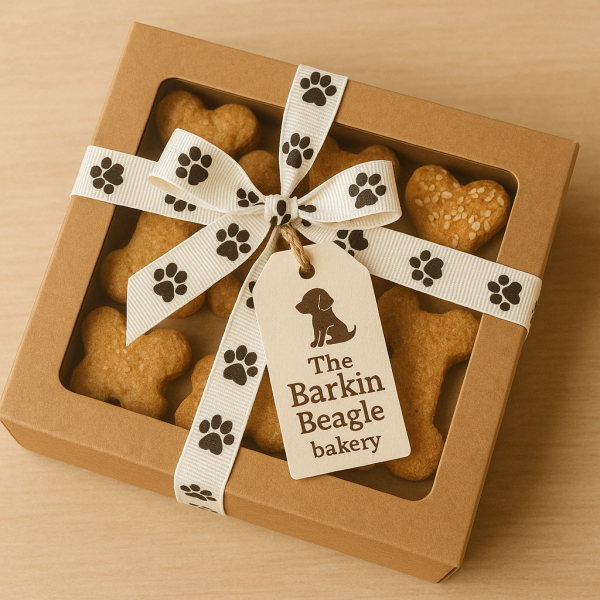
Perfect for farmer’s markets, pop-up shops, or gift sets. These offer:

  • A rustic, homemade aesthetic
  • Eco-friendly appeal
  • Room for creative branding (stickers, stamps, ribbons)

Add a paw-print stamp, twine, and a “Thank You” tag for bonus charm.

3. Mason Jars or Glass Containers

These give off an upscale, boutique vibe and are great for in-person selling or gifts. Benefits include:

  • Reusable and eco-friendly
  • Clear view of treats
  • Great for soft or refrigerated items

Use chalkboard labels or laser-printed stickers to brand your jars.

4. Cellophane Bags with Toppers

Budget-friendly and great for small treat packs or samples. Just:

  • Fill with treats
  • Seal with a heat sealer or twist tie
  • Staple on a branded cardstock topper with your info

Perfect for giveaways, events, and add-on sales.

5. Tin Cans or Custom Treat Tins

A premium option for special occasions or subscription boxes. They:

  • Keep treats fresh longer
  • Look high-end
  • Make perfect gifts

These cost more, but the presentation pays off in value perception and repeat orders.

How to Label Your Dog Treat Packaging

Your label is your brand’s handshake. It tells customers who you are, what’s in the product, and why it’s safe.

Must-Have Elements on Every Label:

  • Brand name
  • Product name
  • Ingredients list (in descending order by weight)
  • Net weight (in ounces or grams)
  • “For Dog Consumption Only” disclaimer
  • Your business name + contact info
  • Expiration or best-by date

Optional but helpful:

  • Nutritional info (if tested)
  • Storage instructions
  • Allergen warnings

💡 Dog treat business tip: If you’re just starting out, use printable labels from home or order through affordable sites like Avery, Canva, or Sticker Mule.

How to Price Homemade Dog Treats for Profit

You want your treats to be affordable—but also profitable. Here’s a simple formula to help:

🧮 Pricing Formula:

Cost of ingredients + packaging + labor time
× 2 or 3 (markup for profit and overhead)
= Your selling price

Example:
If a batch costs $10 to make and yields 20 treats = $0.50 per treat
Add packaging + labor = $0.75 per treat
Sell for $1.50–$2.00 per treat for retail

Remember to research competitor prices in your area and online.

Where to Sell Homemade Dog Treats

Once your treats are packaged and priced, it’s time to start selling. Here are top places to launch your dog treat business:

1. Farmer’s Markets & Local Events

These give you direct access to pet parents in your community. Set up a booth with samples, a treat menu, and eye-catching packaging.

2. Online via Etsy or Shopify

Create a small online store using Shopify, Etsy, or your own website. Take quality photos, use clear descriptions, and include shipping policies.

3. Pet Boutiques or Grooming Shops

Pitch your treats to local pet stores or groomers who want to stock locally made goods. Offer samples and professional-looking packaging.

4. Dog Parks & Pop-Up Stands

If your area allows, a pop-up table at a dog park is a great way to meet new customers.

5. Social Media & Subscription Boxes

Leverage Instagram, Facebook, and TikTok to share videos of your baking process, treat packaging, and happy customers. You can also offer a monthly treat box!

💡 Dog treat business tip: Include a free sample or coupon with every order to boost repeat business.

How to Brand Your Dog Treat Business

Your brand is more than a name—it’s your story, vibe, and voice. To build trust and loyalty, you need a consistent and engaging brand.

Key Brand Elements:

  • A catchy, dog-inspired business name (like The Barkin’ Beagle Bakery)
  • A clear logo and color palette
  • Taglines that reflect your mission (e.g., “Wholesome Treats for Happy Tails”)
  • Consistent fonts and tone across labels, packaging, and social media

Don’t underestimate the power of storytelling. Share why you started your business—was it for your rescue pup? Your child’s love of baking? Customers connect with authentic passion.

Customer Loyalty Tips for Long-Term Growth

Once someone tries your treats, make it easy for them to come back for more.

Offer treat club memberships
Create a punch card for markets
Use email marketing to announce new flavors
Run giveaways and referral incentives
Collect reviews and testimonials

Avoid These Common Mistakes

Many new treat makers run into these issues when trying to sell homemade dog treats:

🚫 Not researching packaging laws
🚫 Using ingredients that aren’t safe for dogs
🚫 Underpricing their products
🚫 Skipping branding or label design
🚫 Ignoring local regulations

Success in the dog treat business is about consistency, trust, and showing up like a professional—even from your kitchen!

Final Thoughts

Starting a dog treat business from home is an exciting (and rewarding!) adventure. By investing in thoughtful dog treat packaging ideas and learning how to sell homemade dog treats professionally, you can stand out in a booming industry filled with passionate pet parents.

Take the time to research, test recipes, design quality labels, and show off your treats in packaging that reflects your love and care. With a little creativity, a solid plan, and the right tools, you can build a loyal customer base and a paws-itively successful business.

🎁 BONUS: Free Printable Dog Treat Labels

Ready to package your treats like a pro?

Download your FREE printable label set — includes:

✅ 5 cute dog-themed label designs
✅ Space for treat names and ingredients
✅ Printable in standard sizes
✅ Works with Avery sticker templates or plain paper

👉 Click here to download your free dog treat labels

Want help launching your dog treat business?
Grab the Dog Bakery Starter Kit™ for step-by-step guides, recipe planners, ingredient safety checklists, and templates to get started fast!

10 Dog Treat Business Mistakes Beginners Make (and How to Avoid Them)

So you’re thinking of turning your homemade dog treats into a real business—amazing! 🐶 But before you preheat the oven and print your labels, there are a few common mistakes you’ll want to avoid. Starting a dog treat business from home can be incredibly rewarding, but skipping key steps early on can lead to wasted time, money, and missed opportunities.

In this post, we’re breaking down the 10 most common beginner mistakes in the dog bakery world—plus how to sidestep them like a pro.

🎁 Ready to skip the guesswork?
👉 Grab your Dog Bakery Starter Kit™ and get everything you need to launch your dog treat biz the smart way!

1. Skipping Market Research

Jumping in without knowing your target customer is a recipe for disappointment. You need to understand:

  • What dog parents in your niche are looking for
  • Popular treat types (grain-free, soft chews, novelty treats)
  • Where they shop (Etsy? Instagram? Local markets?)

🛠 Avoid it by: Researching competitors and identifying a niche you can serve with love.

2. Using Unsafe Ingredients

Some ingredients that are safe for humans—like chocolate, raisins, or xylitol—can be toxic for dogs.

🛠 Avoid it by: Sticking to a pet-safe ingredient list. Always double-check before trying something new.

✔️ The Dog Bakery Starter Kit™ includes a Pet-Safe Ingredient Guide to help you stay compliant and confident.

3. Not Pricing for Profit

Many beginners undercharge or forget to factor in their time, packaging, and overhead.

🛠 Avoid it by: Using a simple formula:
(Ingredient + packaging + time) x 2 or 3 = Retail Price

✔️ The Treat Pricing Guide in our Starter Kit takes the guesswork out of setting prices that work!

4. Skipping Legal Requirements

Selling pet food is regulated in most states—even if it’s made at home. Ignoring local rules can result in fines or shutdowns.

🛠 Avoid it by: Researching your state’s pet treat laws and contacting the Department of Agriculture.

✔️ The Starter Kit includes a Business Setup Checklist to help you get legally compliant, fast.

5. Not Defining a Brand

Treats are everywhere—but your brand is what makes you memorable. Without a clear look, tone, and mission, it’s hard to stand out.

🛠 Avoid it by: Creating a brand identity—name, logo, colors, and packaging—that reflects your values and style.

6. Selling Everywhere (Without a Plan)

Trying to sell on Etsy, Facebook, local markets, and your own site all at once can lead to burnout.

🛠 Avoid it by: Choosing 1–2 focused sales channels to start. Master those before expanding.

✔️ The Dog Bakery Starter Kit™ helps you decide the best platform for your stage of business.

7. Not Collecting Reviews or Testimonials

Social proof is powerful. If you’re not asking happy customers to share feedback, you’re missing a major opportunity.

🛠 Avoid it by: Creating a simple follow-up message or card asking for reviews.

🐾 Pro Tip: Offer a discount on their next order in exchange for a testimonial!

8. Lacking Product Descriptions and Clear Labels

Treats may be cute, but customers also want to know what’s inside and how to store them.

🛠 Avoid it by: Including:

  • A clear ingredient list
  • Allergen info
  • Storage instructions
  • Your brand logo and contact info

✔️ The Starter Kit includes printable label templates and branding tips to help you package like a pro!

9. Underestimating Marketing

Your dog treats won’t sell if no one knows they exist! Don’t wait for customers to magically find you.

🛠 Avoid it by: Posting regularly on social media, starting an email list, and using Pinterest to drive traffic.

📲 The Social Media Promo Pack in the Starter Kit gives you ready-to-use content to save time and get noticed.

10. Trying to Do Everything Alone

From legal steps to marketing to packaging—it’s a lot. Many beginners burn out before they even launch.

🛠 Avoid it by: Leaning on proven tools, guides, and communities. You don’t have to figure it all out yourself.

Final Thoughts: Start Smart, Not Stressed

Every successful dog bakery you see today started somewhere—and probably made a few of these mistakes along the way. But now you don’t have to!

You can launch with clarity, confidence, and a tail-wagging brand that customers trust.

🎁 Want a Shortcut to Success

Grab your copy of the Dog Bakery Starter Kit™ and get everything you need to avoid these mistakes and build a profitable dog treat business from home.

✅ Step-by-Step Startup Guide✅ Pet-Safe Ingredient List
✅ Printable Packaging Templates
✅ Recipe Planner + Signature Treat Tracker
✅ Shopify Setup Guide
✅ Social Media Promo Pack
…and more!

👉 Click here to get started today

Easy Homemade Dog Treat Recipes for Beginners (3 Simple Recipes + Tips!)

Are you searching for easy homemade dog treat recipes for beginners that are healthy, affordable, and fun to make? You’re in the right place! Whether you’re baking for your pup or dreaming of turning your passion into a business, making your own dog treats is the perfect place to start.

In this post, we’ll explore why homemade treats are a fantastic option, share three simple recipes you can make with pantry staples, and explain how you can turn your hobby into a side hustle. Plus, we’ll show you how the Dog Bakery Starter Kit™ can help you launch your own treat-making journey today!

Why Make Your Own Dog Treats?

Making dog treats at home comes with so many benefits:

Healthier Ingredients – You know exactly what’s going into your dog’s snacks. No hidden fillers, preservatives, or artificial flavors.

Customizable for Allergies – You can easily swap out ingredients to fit your pup’s needs (think grain-free or chicken-free).

Save Money – Store-bought treats can be pricey! DIY options are budget-friendly and often make big batches.

Bonding Time – Baking for your dog is a fun way to bond, and trust us—your pup will love being the official taste tester!

Business Potential – Love baking? You can turn this hobby into a profitable dog treat business (more on that below!).

What You’ll Need to Get Started

To begin your treat-making journey, you don’t need anything fancy. Here are the basics:

  • A mixing bowl and spoon
  • Measuring cups
  • A baking sheet
  • Parchment paper
  • Cookie cutters (optional, but cute!)

We also recommend grabbing a copy of our Dog Bakery Starter Kit™, which includes:

  • A recipe planner
  • Pet-safe ingredient guide
  • Treat tracker
  • Business checklist
  • Promo templates and more!

👉 Get Your Dog Bakery Starter Kit Today and start baking with confidence!

3 Easy Homemade Dog Treat Recipes for Beginners

1. Peanut Butter Pumpkin Poppers

These soft, chewy treats are packed with flavor—and dog-safe ingredients!

Ingredients:

  • 1/2 cup natural peanut butter (xylitol-free)
  • 1/2 cup canned pumpkin
  • 1 1/4 cups whole wheat flour

Instructions:

  1. Preheat oven to 350°F.
  2. Mix all ingredients in a bowl until dough forms.
  3. Roll dough and cut into shapes or scoop into small balls.
  4. Place on a parchment-lined baking sheet.
  5. Bake for 20–25 minutes or until firm.
  6. Let cool before serving.

Shelf Life: Store in an airtight container for up to 1 week or freeze for 2–3 months.

2. Banana Oat Bites (3 Ingredients!)

Perfect for beginner bakers and sensitive pups.

Ingredients:

  • 1 ripe banana
  • 1 cup rolled oats
  • 1 egg

Instructions:

  1. Preheat oven to 350°F.
  2. Mash banana in a bowl.
  3. Stir in oats and egg until well combined.
  4. Scoop dough into small bite-sized balls.
  5. Place on a lined baking tray and flatten gently.
  6. Bake for 15–18 minutes until golden brown.
  7. Cool completely before giving to your dog.

Pro Tip: These make excellent training treats!

3. Apple & Carrot Crunchies

A crunchy snack loaded with fiber and flavor.

Ingredients:

  • 1/2 cup grated apple (peeled)
  • 1/2 cup grated carrot
  • 1 1/2 cups oat flour
  • 1 egg
  • 1 tbsp coconut oil

Instructions:

  1. Preheat oven to 325°F.
  2. Mix all ingredients into a stiff dough.
  3. Roll dough and cut into small rectangles or use bone-shaped cutters.
  4. Bake for 25–30 minutes, flipping halfway for even crunch.
  5. Cool and store in a dry container.

These are great for dogs who love a crispier treat!

Safety First: What NOT to Use

Some human ingredients can be harmful to dogs. Avoid using:

  • Chocolate
  • Xylitol (often in peanut butter)
  • Grapes or raisins
  • Onions or garlic
  • Macadamia nuts
  • Nutmeg
  • Too much salt or sugar

That’s why our Dog Bakery Starter Kit™ includes a complete Pet-Safe Ingredient Guide—so you’ll always bake with confidence.

👉 Download the Dog Bakery Starter Kit™ Now for all the tools you need to bake smarter!

Tips for Perfect Homemade Dog Treats

🦴 Stick to Simple Recipes
Start with a few basic ingredients you know are safe and experiment as you gain confidence.

🦴 Use Fun Cookie Cutters
Dog bone and paw print shapes add a fun, professional touch (great if you’re thinking of selling!).

🦴 Label & Store Properly
Keep treats in airtight containers and always label them with the date.

🦴 Start Small Batches
Especially when testing new recipes or trying different textures.

🦴 Involve the Family
Making treats can be a great bonding activity with kids, too!

Thinking About Selling Your Treats?

If your pup (and their neighborhood friends) love your treats, why not share them with the world?

Turning your hobby into a business is easier than you think. Here’s why a dog treat side hustle is perfect for beginners:

🐾 Low Startup Costs
You don’t need a commercial kitchen or storefront—just your home oven and a few simple tools.

🐾 Flexible Hours
Bake on your schedule and sell locally or online.

🐾 Creative Fun
Design your own flavors, packaging, and brand name.

🐾 Make a Difference
Many treat bakers also support shelters, rescues, and local events.

Want to skip the guesswork and start with confidence? The Dog Bakery Starter Kit™ gives you everything you need in one download.

What’s Inside the Dog Bakery Starter Kit™

Here’s a sneak peek of what you’ll get:

📝 Step-by-Step Startup Guide
Walk through every stage of launching your business.

📓 Treat Recipe Planner & Tracker
Organize your best creations and plan new batches.

📦 Pet-Safe Ingredient Guide
Avoid harmful ingredients and substitute confidently.

📈 Business Basics & Setup Checklist
Make sure your business is legal and ready to go.

📱 Social Media Promo Pack (Top Dog Tier)
Editable Canva templates to start promoting right away!

💡 Pricing & Treat Naming Guide (Top Dog Tier)
Confidently brand and price your treats for profit.

🛍️ Shopify Setup Guide (Alpha Premium Tier)
Take your business online with a simple, step-by-step plan.

Get Started Today

Whether you’re baking just for your pup or dreaming of selling your treats to fellow dog lovers, the best time to start is NOW.

🎉 Ready to bake up something amazing?
👉 Grab the Dog Bakery Starter Kit™ Today and get everything you need to turn your homemade treats into something paws-itively profitable.

Final Thoughts

Baking homemade dog treats is one of the easiest and most rewarding ways to show love to your furry friend. With just a few ingredients and some simple steps, you can create snacks that are healthier, cheaper, and more fun than anything store-bought.

And if you’ve ever dreamed of starting a dog treat business, there’s never been a better time. With tools like the Dog Bakery Starter Kit™, you can turn your hobby into a thriving side hustle in just days.

🐶 Bake with love. Build with confidence.
👉 Start your treat-making journey today!

Don’t forget to share this post with other pet lovers—and tag us @TheBarkinBeagleBakery if you bake any of these recipes!

From Oven to Income: How to Turn Your Dog Treat Hobby into a Profitable Side Hustle

Dreaming of turning your love for baking into a booming business? If your pup is already obsessed with your homemade dog treats, it might be time to turn that hobby into a money-making side hustle. Starting a dog treat business from home is not only fun and fulfilling — it can be surprisingly profitable. Whether you’re looking to make extra income or build something full-time, this guide will show you how to get started.

1. Why Now Is the Perfect Time to Start a Dog Treat Side Hustle

The pet industry is booming — and homemade dog treats are one of the fastest-growing niches. Pet parents want healthier, preservative-free options, and many are turning to small businesses for quality treats they can trust. With more people shopping local and online for their furry friends, now’s the perfect time to launch your own dog treat business from home.

Over $58 billion was spent on pet food and treats in 2023 alone
✅ Homemade treats give you a unique edge with customizable, wholesome recipes
✅ It’s a low-cost side hustle you can start with ingredients in your pantry

2. Start with What You Have: Your Home Kitchen Can Launch a Business

You don’t need a commercial kitchen or fancy equipment to begin. Start simple with what’s already in your home.

Basic Tools:

  • Mixing bowls and measuring cups
  • Rolling pin and cookie cutters (bone shapes are always a hit!)
  • Baking sheets and parchment paper
  • Airtight containers for storage

Want to try your first recipe? 👉 Try Some of Our Pup-Approved Recipes Here

3. Build a Brand That Stands Out (Without a Marketing Degree)

A strong brand builds trust. It’s how your treats go from just “cute” to must-have.

Tips for Homemade Dog Treat Branding:

  • Choose a catchy business name (like The Barkin’ Beagle Bakery 😉)
  • Use consistent colors, fonts, and style for your labels and packaging
  • Print ingredient lists and expiration dates on every treat bag
  • Add a paw-some thank-you note or pup pun inside each order

📦 Want help with branding and templates? Grab the Dog Bakery Starter Kit™ to get done-for-you packaging tools and logo guides.

4. Where to Sell Your Homemade Dog Treats

Once your treats are ready, it’s time to sell!

Best Places to Start:

  • Farmers Markets: Perfect for face-to-face sales and local exposure
  • Craft Fairs and Dog Events: High-traffic areas for dog lovers
  • Online Shops: Open a Shopify or Etsy store and reach pet parents nationwide
  • Social Media: Use Instagram, Facebook, or TikTok to showcase your treats

💡 Don’t forget to take cute, rustic product photos and share behind-the-scenes baking shots.

5. Real-Life Example: A Treat Baker’s Transformation

Meet Marissa, a stay-at-home mom who baked her first batch of peanut butter pumpkin treats during quarantine. With support from our Dog Bakery Starter Kit™, she learned how to price her treats, build a simple website, and start selling at her local farmers market.

Now, she brings in over $1,000 a month while still being home with her kids. Marissa said,

“This side hustle gave me purpose, income, and a way to do what I love every day!”

6. Turn Your Passion into Profit with the Dog Bakery Starter Kit™

The journey from hobby baker to business owner can feel overwhelming — but it doesn’t have to be. Our Dog Bakery Starter Kit™ includes everything you need to turn your dream into a reality:

🐾 Step-by-step startup guide
🐾 Pet-safe ingredient list
🐾 Sales strategies + pricing formulas
🐾 Label templates and packaging tips
🐾 Social media marketing starter pack

👉 Get your Dog Bakery Starter Kit now and start baking up success today!

Final Thoughts

Starting a dog treat side hustle is more than just baking — it’s about bringing joy to dogs, building something meaningful, and creating a stream of income from home. With the right tools, guidance, and a little hustle, your kitchen can become the heart of a booming business.

Dog Treat Recipes for Beginners: Easy, Healthy, and Pup-Approved!

Are you a proud dog parent looking to spoil your furry friend with homemade treats? Whether you’re baking out of love or starting a dog treat side hustle, dog treat recipes for beginners are the perfect place to start. These simple, healthy, and delicious treats are made with easy-to-find ingredients, require minimal baking skills, and are 100% pup-approved!

In this guide, you’ll find:

  • Why making your own dog treats is a great idea
  • Tips for getting started
  • Three easy dog treat recipes for beginners
  • A bonus idea if you’re thinking of turning your baking hobby into a business!

🐾 Why Make Your Own Dog Treats?

If you’ve ever flipped over a store-bought dog treat package and couldn’t pronounce half the ingredients—you’re not alone. Making your own dog treats at home isn’t just a fun hobby—it’s one of the most thoughtful things you can do for your pup. Here’s why more pet parents are turning to homemade dog treats:

✅ Healthier Ingredients = Healthier Dogs

When you make treats from scratch, you control every single ingredient. That means no artificial preservatives, fillers, dyes, or additives—just wholesome, natural ingredients that support your dog’s health. You can stick to pet-safe, vet-approved foods like pumpkin, oats, peanut butter (xylitol-free), bananas, carrots, and more. If you’re aiming to improve your dog’s digestion, coat, or energy levels, homemade treats are a great place to start.

✅ Complete Customization for Dietary Needs

Many dogs have food sensitivities or allergies to common ingredients like wheat, chicken, or dairy. When you make your own dog treats, you can tailor each recipe to your dog’s dietary restrictions. Whether your pup needs grain-free treats, low-fat snacks, or a special peanut butter alternative, you’re in full control. You can even make treats soft or crunchy based on your dog’s age and dental health.

✅ Cost Savings That Add Up

Let’s face it—premium dog treats from pet stores can get pricey. Making your own treats at home is not only cost-effective, it allows you to make bigger batches for a fraction of the price. With pantry staples like bananas, oats, or canned pumpkin, you can whip up multiple servings that are just as nutritious—without breaking the bank. If you have more than one dog or love to treat your pup often, homemade is the budget-friendly way to go.

✅ A Special Way to Bond With Your Pup

Baking treats isn’t just for birthdays and holidays—it’s a sweet way to show your dog you care every day. Dogs can sense when something is made just for them, and they’ll love the attention, routine, and reward that comes with your homemade goodies. Many pet owners say that making treats helps them feel more connected to their dogs, especially when baking becomes a fun ritual you both look forward to.

Essential Tools to Get Started

Before we dig into the recipes, let’s talk about the basics you’ll need:

  • Mixing bowl
  • Measuring cups and spoons
  • Baking sheet
  • Parchment paper or silicone baking mat
  • Cookie cutters (optional, but fun!)

Pro tip: You don’t need fancy tools to get started. Even a spoon and your hands will do the trick for most beginner dog treat recipes.

Beginner Tips for Making Dog Treats

If this is your first time baking for your pup, here are a few beginner tips:

  • Use dog-safe ingredients like pumpkin, oats, bananas, and peanut butter (xylitol-free).
  • Avoid harmful foods like chocolate, grapes, raisins, onions, and artificial sweeteners.
  • Store properly. Homemade treats don’t have preservatives, so keep them in the fridge for up to a week or freeze for longer storage.
  • Start small. Make a small batch first to test what your pup likes.

Now, let’s get into the recipes!

Recipe #1: 3-Ingredient Banana Oat Bites 🍌

Perfect for beginners—no special equipment needed!

Ingredients:

  • 1 ripe banana
  • 1 cup rolled oats (or oat flour)
  • 1 egg

Instructions:

  1. Preheat oven to 350°F (175°C).
  2. In a bowl, mash the banana.
  3. Stir in oats and egg until you have a sticky dough.
  4. Scoop into small balls or flatten into mini cookies.
  5. Place on a parchment-lined baking sheet.
  6. Bake for 15–18 minutes or until golden.
  7. Cool completely before serving.

Why Dogs Love It:

The banana adds natural sweetness, and the oats are gentle on tummies. It’s soft, chewy, and great for senior dogs, too!

Recipe #2: Peanut Butter Pumpkin Poppers

This recipe smells so good you might want to taste it yourself!

Ingredients:

  • 1 cup canned pumpkin (unsweetened)
  • ½ cup natural peanut butter (xylitol-free!)
  • 2 ½ cups whole wheat flour
  • ½ tsp cinnamon (optional)

Instructions:

  1. Preheat oven to 350°F (175°C).
  2. In a large bowl, mix pumpkin and peanut butter until smooth.
  3. Slowly add flour (and cinnamon if using), stirring to form a dough.
  4. Roll out and cut into shapes using cookie cutters.
  5. Place on a lined baking sheet and bake for 20–25 minutes.
  6. Cool completely and store in an airtight container.

Bonus Tip:

If your dog has a peanut allergy, swap peanut butter for sunflower seed butter or plain pumpkin puree!

Recipe #3: No-Bake Apple & Carrot Nibbles 🥕

Short on time? These no-bake dog treats are fast, easy, and freezer-friendly.

Ingredients:

  • 1 cup grated carrots
  • 1 apple, finely chopped or grated (seeds removed)
  • 1 ½ cups oat flour
  • ¼ cup plain Greek yogurt
  • 1 tbsp coconut oil (melted)

Instructions:

  1. Mix all ingredients in a bowl until well combined.
  2. Roll into small balls or press into silicone molds.
  3. Place in the freezer for 1–2 hours until firm.
  4. Store in the fridge for up to 1 week or keep frozen.

Great For:

Hot summer days, sensitive stomachs, or when you don’t feel like turning on the oven!

Safety First: Ingredients to Avoid in Dog Treats

Even beginner-friendly dog treat recipes must stay clear of:

  • Xylitol (commonly found in peanut butter—always double-check!)
  • Chocolate and cocoa powder
  • Raisins and grapes
  • Onions and garlic
  • Macadamia nuts

Always check with your vet if you’re unsure about a new ingredient.

Want to Turn Your Dog Treat Hobby Into a Business?

Did you know homemade dog treats are one of the easiest side hustles to start in 2025? With low startup costs and high demand, it’s the perfect gig for dog lovers and home bakers.

👉 Check out the Dog Bakery Starter Kit™—created by The Barkin’ Beagle Bakery to help beginners start and grow a successful dog treat business from home. You’ll get:

  • Step-by-step guides
  • Tested recipes
  • Pricing tips
  • Labeling rules
  • Social media templates
  • And so much more!

With 3 pricing tiers, you can start small and scale big—fetch your pack today!

Common Questions About Homemade Dog Treats

How long do homemade dog treats last?

Most baked treats last up to 7 days in the fridge and 2–3 months in the freezer. No-bake or soft treats should always be refrigerated.

Can I sell these beginner dog treat recipes?

Yes—but check your local laws and pet food regulations. Most states require basic registration, labeling guidelines, and safe storage practices. Our Dog Bakery Starter Kit™ covers everything you need to know.

What’s the best flour to use?

  • Oat flour – great for sensitive stomachs
  • Whole wheat flour – affordable and widely used
  • Coconut flour or rice flour – gluten-free options (absorb more liquid, so adjust accordingly)

Final Thoughts: You Can Bake Like a Pro (Even If You’re a Beginner!)

Making your own dog treats is more than just a fun activity—it’s an act of love. Whether you’re making banana oat bites, pumpkin poppers, or apple carrot nibbles, your pup will appreciate the effort—and you’ll enjoy the joy of treating them with something wholesome.

If you’re ready to take the next step and turn your baking into a business, don’t forget to grab your Dog Bakery Starter Kit™. It’s the best way to go from beginner to barkery boss.

📌 Don’t Forget to Pin This Post!

Love these dog treat recipes for beginners? Save them for later and follow us on Pinterest at @BarkinBeagleBakery for more dog treat inspiration, baking tips, and business ideas!