Blog 2.0

Homemade Dog Treats: Valentine’s Day Edition

Valentine’s Day is a time to celebrate love, and our furry friends deserve to feel the love too! Homemade dog treats are a wonderful way to show your pup how much you care. These Valentine-themed treats are not only adorable but also safe and healthy for your canine companions. In this post, we’ll explore the benefits of homemade dog treats, share an easy recipe for heart-shaped Valentine dog treats, and provide a recipe for pet-safe icing to decorate them.

homemade dog treats for valentines day

Why Make Homemade Dog Treats?

Store-bought treats can be convenient, but they often contain artificial ingredients, preservatives, and excessive amounts of sugar and salt that may not be ideal for your dog’s health. By making treats at home, you have complete control over the ingredients, ensuring your pup gets a nutritious and tasty snack. Additionally, creating homemade treats is a fun activity that allows you to personalize the goodies to suit your dog’s preferences and dietary needs.

Ingredients to Avoid in Dog Treats

When making treats for your dog, it’s essential to avoid harmful ingredients. Here are a few common items that are toxic to dogs:

  • Chocolate
  • Xylitol (a sugar substitute)
  • Onions and garlic
  • Raisins and grapes
  • Macadamia nuts

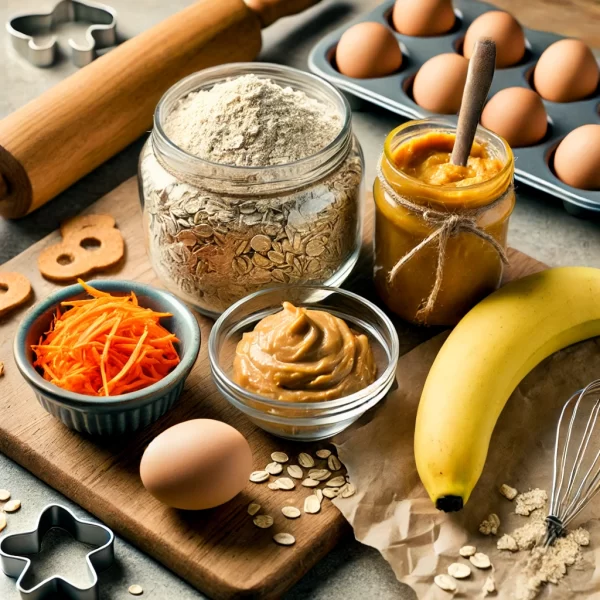
Instead, opt for dog-safe ingredients like peanut butter (without xylitol), pumpkin, sweet potatoes, and whole-grain flours.

Valentine Dog Treat Recipe

These heart-shaped treats are perfect for celebrating Valentine’s Day with your pup. They’re easy to make, nutritious, and fun to decorate. Let’s dive into the recipe!

Ingredients:

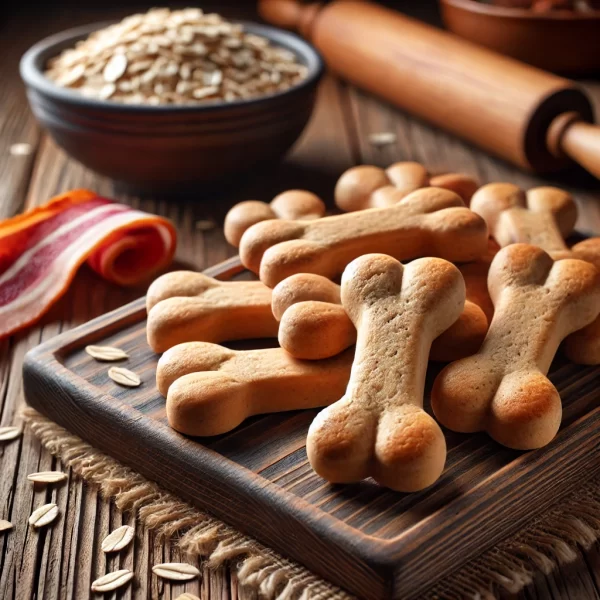
  • 2 cups whole wheat flour (or oat flour for a gluten-free option)
  • ½ cup unsweetened applesauce
  • ½ cup natural peanut butter (ensure it’s free of xylitol)
  • ½ teaspoon baking powder
  • ½ cup water

Instructions:

  1. Preheat your oven: Set your oven to 350°F (175°C) and line a baking sheet with parchment paper.
  2. Mix wet ingredients: In a medium bowl, combine the applesauce, peanut butter, and water. Stir until smooth.
  3. Add dry ingredients: Gradually add the flour and baking powder to the wet mixture. Stir until a dough forms.
  4. Roll and cut: On a lightly floured surface, roll out the dough to about ¼ inch thickness. Use a heart-shaped cookie cutter to cut out treats.
  5. Bake: Place the heart-shaped treats on the prepared baking sheet and bake for 20-25 minutes, or until golden brown.
  6. Cool: Allow the treats to cool completely before decorating.

Dog-Safe Icing Recipe

Decorating your homemade dog treats makes them extra special. This dog-safe icing is simple to make and can be used to add a festive touch to your Valentine treats.

Ingredients:

  • 1 cup plain Greek yogurt (unsweetened and unflavored)
  • 2-3 tablespoons tapioca starch (or cornstarch) for thickening
  • Natural food coloring (optional; look for dog-safe options)

Instructions:

  1. Combine yogurt and starch: In a small bowl, mix the Greek yogurt with tapioca starch. Stir until the mixture reaches a smooth and thick consistency. Add more starch if needed.
  2. Add color: If desired, add a few drops of natural food coloring to create festive shades of pink and red. Stir until evenly combined.
  3. Decorate: Use a piping bag or small spatula to decorate the heart-shaped treats. Create simple patterns like hearts, dots, or stripes.
  4. Drying: Allow the icing to set by placing the treats on a rack for 2-3 hours.

Storage Tips for Homemade Dog Treats

To keep your Valentine dog treats fresh:

  • Store them in an airtight container at room temperature for up to one week.
  • For longer storage, keep the treats in the refrigerator for up to two weeks or freeze them for up to three months.

Additional Decorating Ideas

  • Paw Print Designs: Use the icing to create paw prints on the treats.
  • Sprinkles: Add dog-safe sprinkles for extra flair.
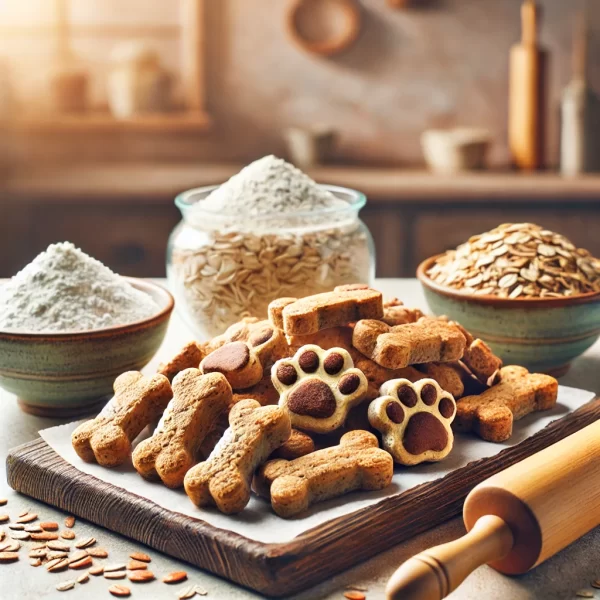
  • Custom Shapes: Experiment with bone-shaped or flower-shaped cookie cutters.

Benefits of Homemade Dog Treats

  1. Healthier Ingredients: Homemade treats allow you to choose high-quality ingredients that are free from harmful additives.
  2. Customization: You can tailor recipes to meet your dog’s dietary needs and preferences.
  3. Bonding Activity: Making treats is a fun way to bond with your dog and show them love.
  4. Cost-Effective: Homemade treats are often more affordable than premium store-bought options.

Final Thoughts

This Valentine’s Day, treat your furry friend to homemade goodies that are as delightful as they are nutritious. With simple ingredients and a touch of creativity, you can whip up treats that your pup will adore. Whether you’re making these for your dog or gifting them to other pet lovers, these Valentine dog treats are sure to spread love and tail wags.

So, grab your rolling pin and cookie cutters, and let the baking begin! Your pup’s wagging tail will be all the thanks you need. Happy Valentine’s Day!

want more easy recipes?

Grab a copy of our FREE Dog Treat Recipe Book Today!

Homemade Dog Treats with Bacon: A Tail-Wagging Recipe Your Pup Will Love

If you’re searching for a delicious way to treat your furry friend, look no further than these homemade bacon dog treats! Packed with wholesome ingredients and the irresistible aroma of bacon, these treats are sure to have tails wagging in no time. Best of all, they’re easy to make and free from the preservatives often found in store-bought options.

Simple Bacon Dog Treat Recipe:
Ingredients:

  • 2 cups whole wheat flour
  • 1/2 cup rolled oats
  • 1/3 cup peanut butter (unsalted, xylitol-free)
  • 2 eggs
  • 4 strips cooked bacon, crumbled
  • 1/3 cup water

Instructions:

  1. Preheat your oven to 350°F (175°C) and line a baking sheet with parchment paper.
  2. In a bowl, combine flour, oats, and bacon.
  3. Add peanut butter, eggs, and water. Mix until a dough forms.
  4. Roll out the dough and use cookie cutters to create fun shapes.
  5. Place treats on the baking sheet and bake for 15-20 minutes until golden brown.

Let the treats cool before serving. Your pup will thank you!

Want More Recipes?
Download our FREE Homemade Dog Treat Recipe Book and discover more tail-wagging ideas to pamper your pup. Click below to grab your copy today!

How to Make Dog Treats: A Step-by-Step Guide with Recipes Using Oat Flour

Homemade dog treats are a fantastic way to ensure your furry friend gets healthy, delicious snacks made with love. Not only are they cost-effective, but they also allow you to control the ingredients, avoiding preservatives and artificial additives. This guide will show you how to make dog treats and provide two simple recipes using oat flour.

Why Make Homemade Dog Treats?

  1. Healthier Ingredients: Store-bought treats often contain fillers, additives, and unnecessary sugars. Homemade treats let you choose wholesome, natural ingredients.
  2. Customizable Recipes: Whether your dog has dietary restrictions or you want to try different flavors, you can tailor recipes to their needs.
  3. Bonding Experience: Baking treats can be a fun activity for the whole family, strengthening the bond between you and your pup.

Essential Ingredients for Homemade Dog Treats

Before diving into recipes, here are some common dog-friendly ingredients:

  • Oat Flour: A gluten-free alternative, perfect for dogs with wheat sensitivities.
  • Peanut Butter: Ensure it’s free of xylitol, a sweetener toxic to dogs.
  • Pumpkin: A great source of fiber and nutrients.
  • Applesauce: Adds natural sweetness.
  • Carrots and Sweet Potatoes: Nutritious and loved by dogs.
  • Eggs: A binding agent that also provides protein.
  • Meat Broth: Adds flavor without extra salt or seasoning.

Tools You’ll Need

  • Mixing bowls
  • Measuring cups and spoons
  • Rolling pin
  • Cookie cutters (optional, for fun shapes)
  • Baking sheet
  • Parchment paper

Our Favorite Baking Supplies!

Recipe 1: Peanut Butter & Pumpkin Oat Flour Treats

Ingredients:

  • 1 cup oat flour
  • 1/2 cup canned pumpkin (unsweetened)
  • 1/4 cup natural peanut butter (xylitol-free)
  • 1 egg

Instructions:

  1. Preheat the Oven: Set your oven to 350°F (175°C).
  2. Mix Wet Ingredients: In a large bowl, combine the pumpkin, peanut butter, and egg. Stir until well blended.
  3. Add Oat Flour: Gradually add the oat flour to the wet ingredients, mixing until a dough forms.
  4. Roll Out the Dough: Place the dough on a floured surface and roll it out to about 1/4-inch thickness.
  5. Cut Shapes: Use cookie cutters or a knife to create treat shapes.
  6. Bake: Place the treats on a parchment-lined baking sheet and bake for 20-25 minutes, or until golden brown.
  7. Cool and Store: Let the treats cool completely before serving. Store in an airtight container for up to two weeks.

Recipe 2: Banana & Carrot Oat Flour Biscuits

Ingredients:

  • 1 cup oat flour
  • 1 ripe banana, mashed
  • 1/2 cup grated carrot
  • 1 egg
  • 2 tablespoons unsweetened applesauce

Instructions:

  1. Preheat the Oven: Heat the oven to 350°F (175°C).
  2. Mash and Mix: In a bowl, mash the banana, then add the grated carrot, applesauce, and egg. Stir until combined.
  3. Incorporate Oat Flour: Slowly mix the oat flour into the wet ingredients until a dough forms.
  4. Shape the Dough: Roll out the dough to about 1/4-inch thickness and cut into shapes.
  5. Bake: Arrange on a baking sheet lined with parchment paper and bake for 20-25 minutes.
  6. Cool and Serve: Allow the treats to cool completely before serving to your dog. Store in a sealed container in the refrigerator for up to 10 days.

Tips for Successful Dog Treats

  • Experiment with Flavors: Try adding dog-friendly fruits like blueberries or veggies like spinach.
  • Texture Matters: For softer treats, bake for a shorter time. For crunchy biscuits, extend baking time slightly.
  • Batch Size: If you’re unsure whether your dog will like the recipe, start with smaller batches.

Benefits of Using Oat Flour

Oat flour is not only a gluten-free option but also rich in fiber, vitamins, and minerals. It’s gentle on sensitive stomachs and easy to digest, making it a great choice for dogs with food sensitivities or allergies.

Storage and Shelf Life

Homemade dog treats don’t contain preservatives, so proper storage is key:

  • Room Temperature: Store in an airtight container for up to a week.
  • Refrigerator: Extend shelf life to 2-3 weeks.
  • Freezer: Freeze treats for up to 3 months. Thaw as needed.

Homemade vs. Store-Bought: Why Homemade Wins

  • Cost-Effective: Save money by using pantry staples.
  • Quality Control: Choose high-quality ingredients you trust.
  • Love in Every Bite: Your dog will feel the care you put into making their snacks.

Want More Recipes? Download our FREE Recipe Book!

Making dog treats at home is a rewarding experience that ensures your dog gets nutritious and delicious snacks. With simple ingredients like oat flour, peanut butter, and pumpkin, you can create healthy, affordable, and fun treats your dog will adore.

Try these recipes and watch your dog’s tail wag with joy! Have fun experimenting with ingredients to create flavors your furry friend will love. Happy baking!

Simple Dog Treats: Delicious Recipes to Pamper Your Pup

If you’re a dog parent, you know the joy of seeing your furry friend wag their tail with excitement over a tasty treat. But why rely on store-bought options when you can make simple, healthy dog treats at home? Homemade dog treats are easy to make, often healthier, and filled with love. In this post, we’ll explore the benefits of homemade treats, tips for preparation, and three easy recipes your dog will adore.

Benefits of Making Homemade Dog Treats

  1. Healthier Ingredients: When you make your own treats, you control the ingredients. This ensures your pup gets wholesome snacks without unnecessary additives or preservatives.
  2. Customizable Recipes: Homemade treats can be tailored to your dog’s preferences and dietary needs. Whether your dog is gluten-free, vegetarian, or has allergies, you can create treats they’ll love.
  3. Cost-Effective: Many homemade treats use basic pantry staples, making them a budget-friendly option compared to premium store-bought options.
  4. Fun and Rewarding: Making treats can be a fun activity for the whole family. Plus, there’s nothing like seeing your dog’s excitement when they try a treat you made just for them.

Tips for Making Dog Treats at Home

  • Choose Dog-Friendly Ingredients: Stick to safe ingredients like peanut butter (unsweetened and xylitol-free), pumpkin, sweet potatoes, oats, and apples. Avoid harmful foods like chocolate, onions, garlic, grapes, and raisins.
  • Test for Allergies: Introduce new ingredients gradually to ensure your dog doesn’t have an adverse reaction.
  • Use Simple Tools: A mixing bowl, cookie cutters, and a rolling pin are usually all you need.
  • Store Properly: Homemade treats often lack preservatives, so store them in an airtight container and refrigerate or freeze if needed.

3 Simple Dog Treat Recipes

1. Peanut Butter Pumpkin Bites

These soft treats are packed with flavor and nutrients. Pumpkin is great for digestion, while peanut butter is a canine favorite.

Ingredients:

  • 1 cup pure pumpkin puree
  • ½ cup natural peanut butter (ensure it’s xylitol-free)
  • 1½ cups whole wheat flour (or a gluten-free alternative)
  • 1 tsp cinnamon (optional)

Instructions:

  1. Preheat your oven to 350°F (175°C).
  2. In a bowl, mix the pumpkin puree and peanut butter until well combined.
  3. Gradually add the flour and cinnamon, mixing until a dough forms.
  4. Roll out the dough on a floured surface and use cookie cutters to shape the treats.
  5. Place the treats on a baking sheet lined with parchment paper.
  6. Bake for 20-25 minutes or until firm.
  7. Let the treats cool completely before serving. Store in an airtight container for up to a week.

2. Cheesy Oat Bites

If your dog loves cheese, these treats will be a hit. They’re quick to prepare and made with simple ingredients.

Ingredients:

  • 1 cup rolled oats
  • ½ cup shredded cheddar cheese
  • 1 egg
  • ½ cup unsweetened applesauce

Instructions:

  1. Preheat your oven to 375°F (190°C).
  2. In a bowl, combine all the ingredients until well mixed.
  3. Scoop small portions of the mixture onto a baking sheet lined with parchment paper.
  4. Flatten each scoop slightly with the back of a spoon.
  5. Bake for 15-18 minutes or until golden brown.
  6. Allow the treats to cool completely before serving. Store in the fridge for up to 5 days.

3. Frozen Banana Yogurt Drops

These refreshing treats are perfect for hot days and are as simple as it gets.

Ingredients:

  • 2 ripe bananas
  • ½ cup plain Greek yogurt
  • 1 tbsp peanut butter

Instructions:

  1. Mash the bananas in a bowl until smooth.
  2. Stir in the yogurt and peanut butter until well combined.
  3. Spoon the mixture into a silicone mold or onto a parchment-lined baking sheet in small dollops.
  4. Freeze for at least 2 hours or until solid.
  5. Pop the frozen treats out of the mold and store them in a freezer-safe container for up to a month.

Additional Ingredient Ideas

Feel free to get creative with these recipes. Here are some dog-friendly ingredients you can use to customize:

  • Vegetables: Sweet potatoes, carrots, green beans
  • Fruits: Blueberries, strawberries, apples (without seeds)
  • Proteins: Cooked chicken or turkey, eggs
  • Grains: Brown rice flour, oat flour

want more recipes?

Download our FREE Recipe Book!

Common Questions About Homemade Dog Treats

1. Can I use regular flour? Yes, but whole wheat or gluten-free alternatives are often better for dogs with sensitive stomachs.

2. How do I know if a treat is safe for my dog? Research each ingredient to ensure it’s dog-safe. When in doubt, consult your vet.

3. Can I make these treats in bulk? Absolutely! Freeze batches to keep them fresh and extend their shelf life.

4. What if my dog has allergies? Use hypoallergenic ingredients like rice flour, sweet potatoes, or limited-protein options to accommodate their needs.

Making simple dog treats at home is a fun and rewarding way to pamper your pup. With just a few ingredients and minimal effort, you can whip up delicious snacks that are healthier and more affordable than store-bought options. Whether you try Peanut Butter Pumpkin Bites, Cheesy Oat Bites, or Frozen Banana Yogurt Drops, your dog will surely appreciate the love and effort behind every bite. Give these recipes a try and enjoy bonding with your furry friend over these homemade delights!

Homemade Dog Treats for Allergies: A Guide to Safe and Delicious Snacking for Your Pup

As dog owners, we want the best for our furry companions, especially when it comes to their health and happiness. However, for dogs with allergies, finding safe and tasty treats can be a challenge. Allergies in dogs can stem from various sources, including grains, certain proteins, and artificial additives found in commercial treats. That’s why making homemade dog treats tailored to your pet’s dietary needs can be a game-changer.

In this blog post, we’ll explore the benefits of homemade dog treats for allergies, common allergens to avoid, and a step-by-step recipe to create a delicious and allergy-friendly snack for your pup.


Why Choose Homemade Dog Treats for Allergies?

  1. Control Over Ingredients: When you make treats at home, you have full control over what goes into them. This allows you to avoid potential allergens and include only the healthiest ingredients.
  2. Freshness Guaranteed: Homemade treats are free from preservatives and artificial ingredients often found in store-bought options. You can ensure your dog is consuming fresh, wholesome snacks.
  3. Cost-Effective: While specialty hypoallergenic treats can be expensive, making your own is often more budget-friendly, especially if you buy ingredients in bulk.
  4. Tailored to Your Dog’s Needs: Every dog is unique. Whether your pup has a grain allergy, a sensitivity to certain proteins, or other dietary restrictions, homemade treats can be customized to suit their needs.

Common Allergens in Dog Treats

When preparing homemade treats for your allergic dog, it’s essential to identify and avoid common allergens. Some of the most frequent culprits include:

  • Grains: Wheat, corn, and soy are common allergens. Opt for grain-free flours like coconut, almond, or chickpea flour.
  • Proteins: Some dogs are allergic to specific proteins like chicken or beef. Alternatives like turkey, duck, or fish are often safer options.
  • Dairy: Many dogs are lactose intolerant, so it’s best to skip cheese, milk, or cream.
  • Artificial Additives: Preservatives, artificial colors, and flavorings can irritate sensitive dogs.

If you’re unsure what your dog is allergic to, consult with your veterinarian and consider an elimination diet to pinpoint the triggers.


Recipe: Allergy-Friendly Sweet Potato and Oat Dog Treats

This recipe is perfect for dogs with grain sensitivities or allergies. It uses simple, natural ingredients that are gentle on the stomach and full of nutrients.

homemade dog treats for allergies

Ingredients:

  • 1 medium-sized sweet potato (cooked and mashed)
  • 1 cup oat flour (you can make this by blending oats in a food processor)
  • 1/4 cup coconut flour
  • 1 egg (or a flaxseed egg for egg-free diets)
  • 2 tablespoons coconut oil (melted)
  • 1/4 teaspoon cinnamon (optional, for added flavor)

Instructions:

  1. Prepare the Sweet Potato: Peel and cube a medium sweet potato. Boil or steam until soft, then mash it into a smooth puree. Let it cool before using.
  2. Preheat Your Oven: Set your oven to 350°F (175°C) and line a baking sheet with parchment paper.
  3. Mix the Dry Ingredients: In a large bowl, combine the oat flour, coconut flour, and cinnamon (if using).
  4. Add the Wet Ingredients: Stir in the mashed sweet potato, melted coconut oil, and egg. Mix until a dough forms. If the dough is too sticky, add a little more coconut flour.
  5. Roll Out the Dough: Lightly flour a clean surface with oat flour. Roll out the dough to about 1/4-inch thickness.
  6. Cut into Shapes: Use cookie cutters to create fun shapes or simply cut the dough into squares with a knife.
  7. Bake: Place the treats on the prepared baking sheet and bake for 20-25 minutes, or until they’re firm and golden.
  8. Cool and Store: Let the treats cool completely before serving. Store them in an airtight container in the fridge for up to two weeks.

Baking For Sensitive Paws: The Best Flours For Dogs With Allergies


Additional Tips for Homemade Dog Treats

  • Test Small Batches: When introducing a new treat, start with a small amount to ensure your dog doesn’t have a reaction.
  • Freeze for Freshness: Homemade treats can be frozen for up to three months. Simply thaw as needed.
  • Experiment with Flavors: Substitute sweet potato with pumpkin or banana for variety, and consider adding dog-safe ingredients like blueberries or peanut butter (ensure it’s xylitol-free).

Want more homemade dog treat recipes?

Download our FREE Dog Treat Recipe Book!

Your dog will be BEGGIN for more!


The Nutritional Benefits of This Recipe

  1. Sweet Potato: Packed with fiber, vitamins A and C, and beta-carotene, sweet potatoes support healthy digestion and immune function.
  2. Oat Flour: A great gluten-free alternative, oat flour is rich in fiber and easy on the stomach.
  3. Coconut Flour: High in fiber and low in carbs, coconut flour adds a subtle sweetness while supporting healthy digestion.
  4. Coconut Oil: Known for its skin and coat benefits, coconut oil also has antimicrobial properties.
  5. Cinnamon: In small amounts, cinnamon can provide antioxidant and anti-inflammatory benefits.

Signs Your Dog May Have Food Allergies

If you’re not sure whether your dog has food allergies, look for these common symptoms:

  • Itchy skin or excessive scratching
  • Red, inflamed patches on the skin
  • Frequent ear infections
  • Digestive issues like vomiting or diarrhea
  • Excessive licking of paws

If you notice any of these signs, consult with your vet for proper diagnosis and treatment.


Final Thoughts

Making homemade dog treats for allergies is not only a thoughtful way to care for your pup but also a practical solution to avoid potential allergens. By using simple, wholesome ingredients, you can create treats that are both nutritious and delicious. Remember to consult with your vet if you have concerns about your dog’s diet or allergies.

Try the Sweet Potato and Oat Dog Treats recipe today and watch your pup’s tail wag with delight! Share your experience or your own allergy-friendly recipes in the comments below. Let’s make snack time safe and enjoyable for all our furry friends.